One feature that I find most interesting in GRUB2 is its ability to boot OSs from ISO images.
Traditionally, working with Live ISOs or installing OS was based on the technology of CD-ROM/DVD-ROM, long before the proliferation of CD-ROM technology, we installed the operating Systems with tapes or floppy disk - back in prehistory-.
This way of working involves making some of the following steps:
- Request and receive the installation media from the software distributor -As we did in the 90s way before the Internet became widespread-.
- Download the ISO and fry a CD; the problem with this method is that you end up with a bunch of CD often only used 1 time.
- Download the ISO and copy it on a pendrive.
Each of these methods represents a considerable improvement in the time it takes to complete the task, compared to the previous -If someone have installed a SCO Unix system using floppy disks, he knows what i'm talking about-.
Nowadays we usually work with method 3, and sometimes with method 2, if something is wrong.
I will show how the ability of GRUB2 to boot ISO images allows me to test and install Ubuntu Studio 13 on my laptop, more efficient than the above methods.
Why Ubuntu Studio?
The choice of Ubuntu Studio comes from the need for a Linux distribution with features of Digital Audio Workstation, and supports for the Digital Audio converter DAC / ADC EMU 0404 USB, my intention is to use them to rip and to process digitally my vinyl collection.
 |
| EMU 0404 USB |
Support for the EMU is an essential requirement and have to be checked quickly, ideally before installing Ubuntu Studio, or any other linux distribution, in the hard drive.
Why not use virtualization for testing?
An alternative to using Live ISOs, that is becoming more popular, is downloading pre-configured virtual machines.In this case I prefer to try Live ISO, requirements of low latency and direct hardware control of programs such as ALSA, JACK, PulseAudio and Audacity exclude the use of virtual machines for previous testings.
Preparing the Environment
We begin by downloading the ISO image.The downloaded ISO must reside on a partition dedicated to the ISOs that I have mounted on /media/ISO.
# sudo mount -o loop /media/ISO/ISO/ubuntustudio-13.04-dvd-amd64.iso /media/loop
We check the contents of the file /media/loop/boot/grub/loopbackp.cfg
/ / BEGIN OF EXCERPT
menuentry "Try Ubuntu Studio without installing" {/ / END OF EXCERPT
set gfxpayload=keep
linux /casper/vmlinuz file=/cdrom/preseed/ubuntustudio.seed boot=casper iso-scan/filename=${iso_path} quiet splash --
initrd /casper/initrd.lz
}
menuentry "Install Ubuntu Studio" {
linux /casper/vmlinuz file=/cdrom/preseed/ubuntustudio.seed boot=casper only-ubiquity iso-scan/filename=${iso_path} quiet splash --
initrd /casper/initrd.lz
}
Mount the partition where resides the independent GRUB2.
# sudo mount /dev/sda2 /mnt
Edit the file /mnt/boot/grub/grub.cfg and add the above lines adapted to the environment, I have marked in bold the modifications made by me:
/ / BEGIN OF EXCERP
menuentry "Try Ubuntu Studio" {
set iso_path=/ISO/ubuntustudio-13.04-dvd-amd64.iso
search --no-floppy --fs-uuid --set=root 53ac1692-a2a0-4506-a85a-5c0eeb7b5700
loopback loop ${iso_path}
set root=loop
linux /casper/vmlinuz file=/cdrom/preseed/ubuntustudio.seed boot=casper iso-scan/filename=${iso_path} quiet splash --
initrd /casper/initrd.lz
}
menuentry "Install Ubuntu Studio" {
set iso_path=/ISO/ubuntustudio-13.04-dvd-amd64.iso
search --no-floppy --fs-uuid --set=root 53ac1692-a2a0-4506-a85a-5c0eeb7b5700
loopback loop ${iso_path}
set root=loop
linux /casper/vmlinuz file=/cdrom/preseed/ubuntustudio.seed boot=casper only-ubiquity iso-scan/filename=${iso_path} quiet splash toram --
initrd /casper/initrd.lz
}
/ / END OF EXCERPT
I added the option toram as kernel boot parameter to avoid having to unmount the filesystem /isodevice with the -f option during the installation process.
Unmount filesystems and reboot:
Once booted Ubuntu Studio I connect the USB hard drive containing my music collection and EMU 0404.
I verify that both, the disk and the EMU, are recognized by Ubuntu Studio and proceed to play a song, proving that it is reproduced flawlessly, without distortion or clicks -sample drops-.
The test has been successfully passed.
Here we use the partition No. 7, at this time we do a screenshot.
Then, take the necessary precautions before proceeding to install; backup GPT Partition Table, make a screenshot with the list of the GPT Partition Table and make a backup important data.
1. - We left -Quit- the installer to gain access to the desktop and we open a shell.
2. - umount /isodevice.
3. - We start the installer from the desktop.
4. - We set up the WIFI and , once connected, press the Back button to select "Download updates while installing".
I structured this step in this way, because I couldn't enabled the WIFI before launching the installer; in your case maybe you succeed or, perhaps, you will to configure a Ethernet interface, instead of WIFI.
5. - Configure the partitions, this is the time where we did the assignment of partitions to Ubuntu Studio and we must proceed with caution.
Since partitions have been previously defined, in no way should alter them, or create new partitions; assign only those already planning to use, in this case 7.
We must be careful in selecting the device on which are going to install GRUB2, NEVER choose /dev/sda, choose /dev/sda7.
Select ext4 as filesystem type with the mounting on the root (/) and check "Format the partition".
Finally in step 5d click "Install Now".
If in the dialog that appears in step 5c instead of pressing "Go Back", you click "Continue", you reach the window of step 5d, but you change the partition table, slightly altering the boundaries of the partition 7; For things like that, we must take precautions before start to install a OS.
In the event you have created the partition table with "bubbles" of 128 MB of unallocated space between partitions, then this slight alteration in the partition boundaries would be completely harmless.
In contrast, if we created adjacent partitions, we have a problem.
6. - We completed the installation parameters.
7. - Load Ubuntu Studio.
8. - After the installation, the installer gives you the choice of Restart or Continue, we chose to Continue.
Then open two shell, run the command blkid and note the UUID of the partition 7.
In the other shell mount the partition /dev/sda2 where the independent GRUB2 resides and add a new entry to the main grub.cfg file to boot Ubuntu Studio 13, for that use the UUID of the partition / dev/sda7.
We save and reboot.
menuentry "Try Ubuntu Studio" {
set iso_path=/ISO/ubuntustudio-13.04-dvd-amd64.iso
search --no-floppy --fs-uuid --set=root 53ac1692-a2a0-4506-a85a-5c0eeb7b5700
loopback loop ${iso_path}
set root=loop
linux /casper/vmlinuz file=/cdrom/preseed/ubuntustudio.seed boot=casper iso-scan/filename=${iso_path} quiet splash --
initrd /casper/initrd.lz
}
menuentry "Install Ubuntu Studio" {
set iso_path=/ISO/ubuntustudio-13.04-dvd-amd64.iso
search --no-floppy --fs-uuid --set=root 53ac1692-a2a0-4506-a85a-5c0eeb7b5700
loopback loop ${iso_path}
set root=loop
linux /casper/vmlinuz file=/cdrom/preseed/ubuntustudio.seed boot=casper only-ubiquity iso-scan/filename=${iso_path} quiet splash toram --
initrd /casper/initrd.lz
}
/ / END OF EXCERPT
I added the option toram as kernel boot parameter to avoid having to unmount the filesystem /isodevice with the -f option during the installation process.
Unmount filesystems and reboot:
# sudo umount /media/loop
# sudo umount /media/ISO
# sudo umount /mnt
# sudo shutdown -r now
Compatibility test
After system reboot the new options appear in the GRUB menu, select Try Ubuntu Studio. |
| Modified GRUB2 Menu |
Once booted Ubuntu Studio I connect the USB hard drive containing my music collection and EMU 0404.
 |
| EMU 0404 USB Ready to play |
I verify that both, the disk and the EMU, are recognized by Ubuntu Studio and proceed to play a song, proving that it is reproduced flawlessly, without distortion or clicks -sample drops-.
 |
| lsusb results and audio playback on Ubuntu Studio 13 via USB DAC / ADC EMU 0404 |
The test has been successfully passed.
Installing Ubuntu Studio on disk partition
Now we can start installing, knowing that there's no hardware compatibility issues.Pre-Installation Tasks
To install an OS in an environment with multiple OSs installed on the same disk, first of all we have to choose the target partition, check the partition type, and add a comment to identify the contents.Here we use the partition No. 7, at this time we do a screenshot.
 |
| Partition Table before installation |
Installation Steps
From the GRUB2 menu, select Install Ubuntu Studio.1. - We left -Quit- the installer to gain access to the desktop and we open a shell.
 |
| STEP 1: Quit the installation |
2. - umount /isodevice.
 |
| STEP 2: umount /isodevice |
3. - We start the installer from the desktop.
 |
| STEP 3a: Run the installer from the desktop. |
 |
| STEP 3b: Check Install this third-party software. |
4. - We set up the WIFI and , once connected, press the Back button to select "Download updates while installing".
 |
| Step 4a: Configure the WIFI and press Back |
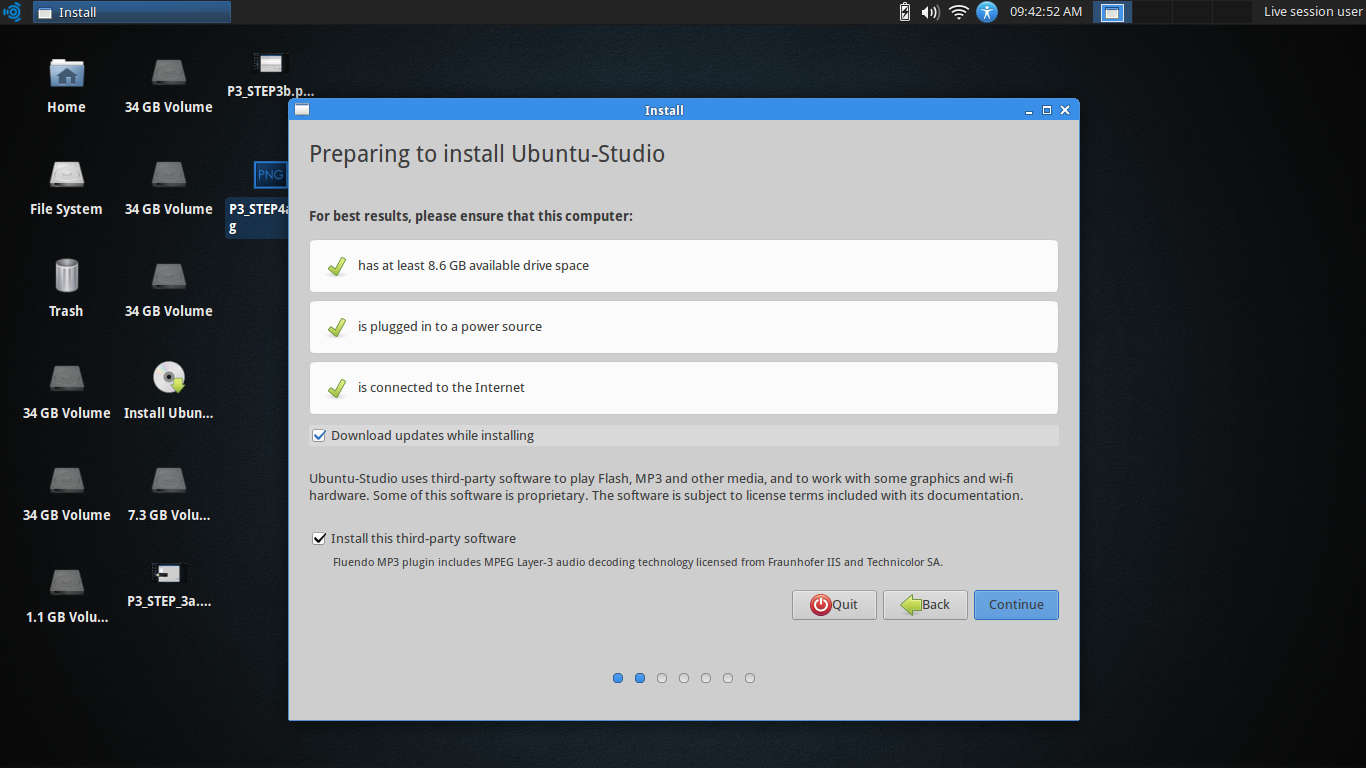 |
| STEP 4b: Check "Download updates while installing" |
I structured this step in this way, because I couldn't enabled the WIFI before launching the installer; in your case maybe you succeed or, perhaps, you will to configure a Ethernet interface, instead of WIFI.
5. - Configure the partitions, this is the time where we did the assignment of partitions to Ubuntu Studio and we must proceed with caution.
 |
| STEP 5a: select installation type "Something else" |
 |
| STEP 5b: Configuring the Target Partition |
Since partitions have been previously defined, in no way should alter them, or create new partitions; assign only those already planning to use, in this case 7.
We must be careful in selecting the device on which are going to install GRUB2, NEVER choose /dev/sda, choose /dev/sda7.
Select ext4 as filesystem type with the mounting on the root (/) and check "Format the partition".
 |
| STEP 5c: ATTENTION HERE: IS RESPONDING "Go Back" |
 |
| Step 5d: Final state as the partition is assigned. |
Finally in step 5d click "Install Now".
If in the dialog that appears in step 5c instead of pressing "Go Back", you click "Continue", you reach the window of step 5d, but you change the partition table, slightly altering the boundaries of the partition 7; For things like that, we must take precautions before start to install a OS.
In the event you have created the partition table with "bubbles" of 128 MB of unallocated space between partitions, then this slight alteration in the partition boundaries would be completely harmless.
In contrast, if we created adjacent partitions, we have a problem.
6. - We completed the installation parameters.
 |
| Step 6a: Setup Time Zone |
 |
| Step 6b: Setup Keyboard and Character set |
 |
| STEP 6c: System Identification |
7. - Load Ubuntu Studio.
 |
| STEP 7a: Loading Ubuntu Studio |
8. - After the installation, the installer gives you the choice of Restart or Continue, we chose to Continue.
Then open two shell, run the command blkid and note the UUID of the partition 7.
 |
| Step 7b: We get the UUID of the partition /dev/sda7 |
In the other shell mount the partition /dev/sda2 where the independent GRUB2 resides and add a new entry to the main grub.cfg file to boot Ubuntu Studio 13, for that use the UUID of the partition / dev/sda7.
 |
| Step 7c: Prepare GRUB2 boot menu for Ubuntu Studio 13 |
We save and reboot.
Post-Installation
As safety precaution, after installing a new OS, I try booting some of the OSs that I have installed, then I boot ArchLinux, which is the distribution that I use to manage storage.From there, I run gdisk, and I do a checking of the boundaries of the partitions using the screenshot of the list of GPT partition table previously generated.
If all went well, select Ubuntu Studio boot from the GRUB menu, Ubuntu Studio boot normally and asks me to update the packages.
 | |||||||||||
|
No comments:
Post a Comment
Comments are welcome, I encourage you to contribute by proposing topics of your interest to develop in this blog.